


7 Steps To Weatherproof a Garage Door

Key Takeaways
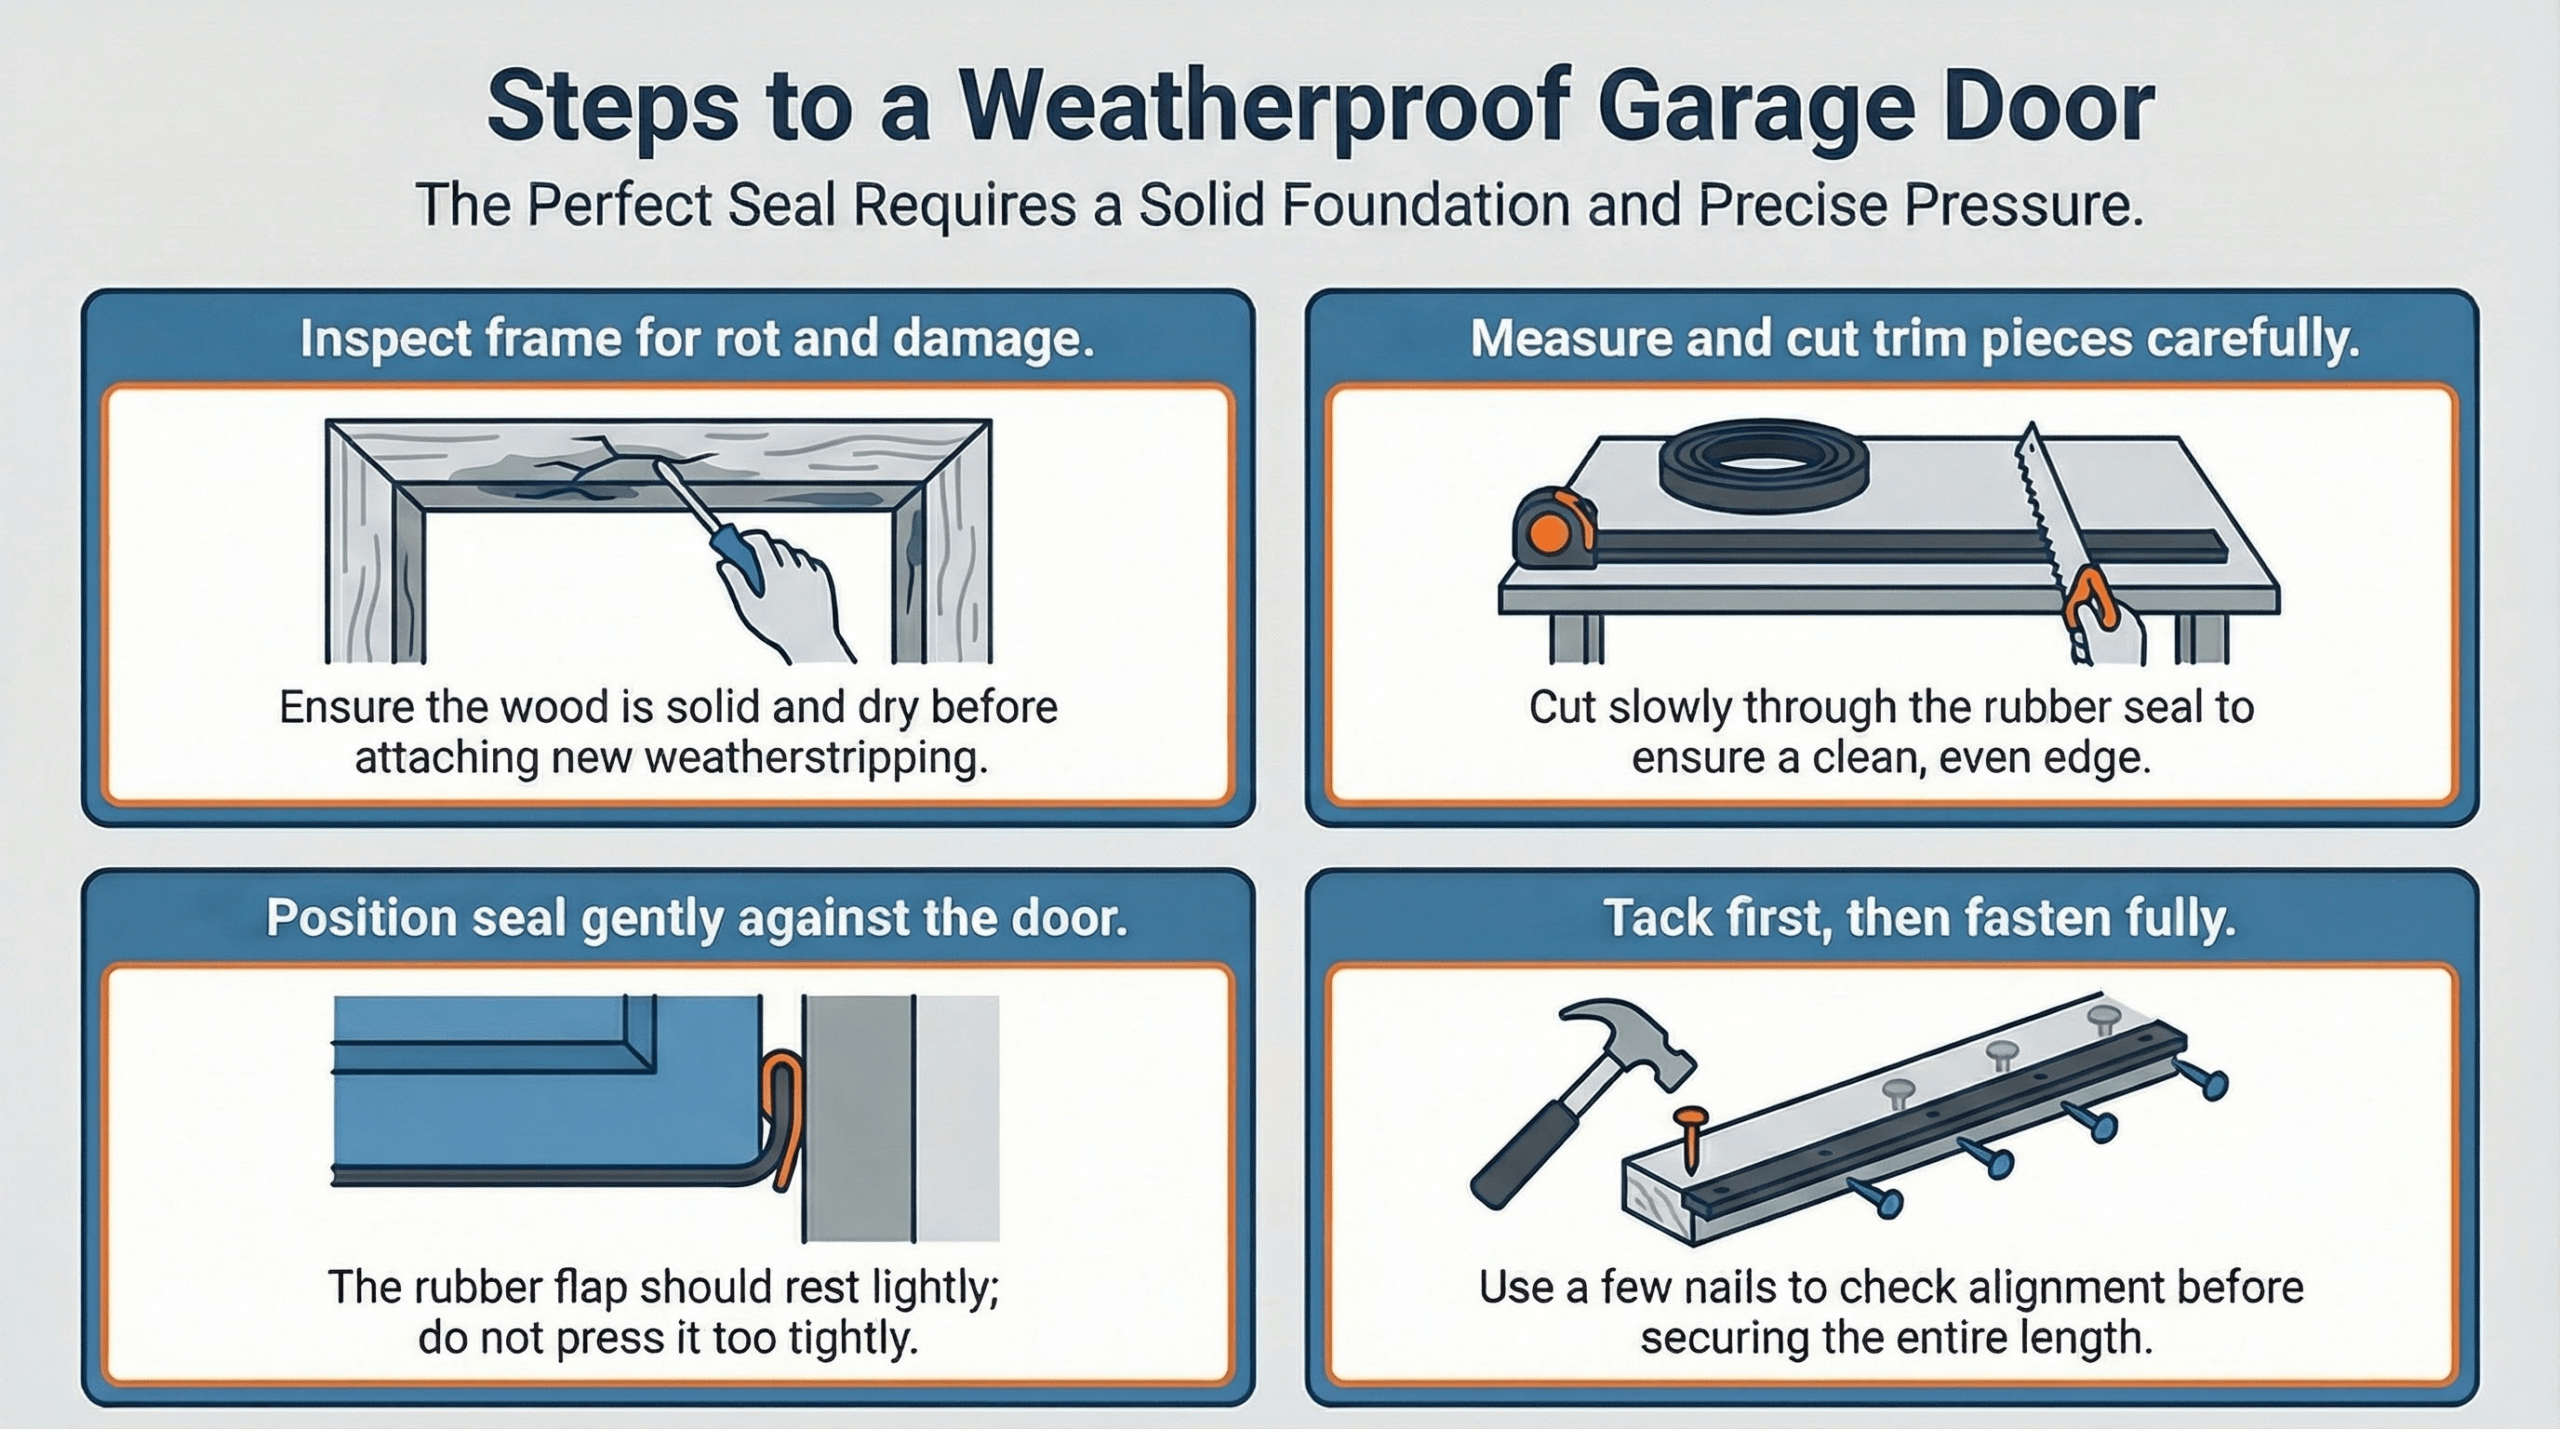
1. Weatherproofing a garage door starts with the basics: a solid frame, properly measured trim, and a seal that sits snugly without being pressed too tightly.
2. Small installation details like even placement and careful fastening help keep out drafts, moisture, dirt, and bugs over time.
3. If you want a longer-lasting fix or your door is uneven, Raynor Door Authority can help with expert service, trained technicians, and the kind of support that makes the job easier to get right.
How to Weatherproof a Garage Door the Right Way
Your garage door does a lot of quiet work. It helps protect your home, shields stored belongings from rain and dust, and softens the impact of outdoor temperatures on the space inside. But when gaps start forming around the edges, that protection weakens fast.
Weatherproofing garage doors is the process of sealing gaps and crevices. Doing so can help maintain the temperature in your garage and prevent damage from leaks.
In this guide, you will learn how to weatherproof a garage door, what problem areas to check first, and which sealing solutions can make the biggest difference.
Step 1: Check the Garage Door Trim and Wood Frame
Before you start weatherstripping garage doors, take a minute to inspect the trim and wood frame around them. It may not seem like the exciting part, but it makes a big difference.
If the wood is cracked, soft, warped, or starting to rot, the seal will not sit properly. And when that happens, you can end up with the same drafts, moisture, and bug problems even after putting in new weatherstripping.
This is why it helps to slow down here and inspect the frame properly before moving on. You are basically making sure the new weatherproofing has something solid to hold onto.
- Check both sides of the garage door and the top trim
- Look for peeling paint, cracks, dark stains, or soft spots
- Press lightly on the wood to see if any area feels weak or spongy
- Look closely at the bottom corners, since those spots usually collect the most moisture
- See if any trim is loose or pulling away from the wall
- Replace damaged or rotted wood before installing new garage door threshold seals
- If you are adding new trim, keep it a little off the ground so it does not sit in water
Once the frame is in good shape, everything else tends to go much more smoothly. If you discover that your frame is severely damaged, contact Raynor Door Authority and we’ll help you fix your garage door and set up weatherproofing.
Step 2: Measure and Prepare the Weatherstripping Trim
Once the frame looks solid, the next step is getting the weatherstripping trim ready. This is the part that will sit around the garage door opening and help close off those small gaps where air, water, dust, and bugs usually get in.
A good option here is PVC garage door trim with a rubber seal already attached. It is practical for a few reasons. The PVC holds up well over time and will not rot like wood can. The rubber edge helps create that snug contact against the door. And if you want everything to match the rest of the exterior, you can paint it too.
Before installing anything, take your measurements carefully. You will want trim pieces for:
- One side of the garage door
- The other side of the garage door
- The top header
Try to measure each section exactly as it will sit in place. That helps you avoid gaps at the corners or pieces that need to be recut later. If you are planning to butt joint the trim, make sure the side pieces and top piece line up neatly where they meet.
Step 3: Cut the Trim Carefully
Now that your measurements are ready, you can cut the trim pieces to size before attaching them around the garage door. This part is pretty straightforward, but it is worth taking slowly. A clean cut helps the trim sit better, look neater, and seal more evenly once it is installed.
The main thing to watch is the rubber seal attached to the trim. If you move too fast through that section, the blade can catch it and leave the edge torn, chipped, or a little rough. That may not seem like a huge deal at first, but uneven cuts can make the finished trim look off and may affect how well the garage door threshold seals against the door.
Here’s a simple way to handle it:
- Mark each trim piece clearly before cutting
- Set the trim in place securely so it does not shift
- Cut slowly, especially when the blade reaches the rubber part
- Let the saw move through the material without forcing it
- Check the cut edge once you are done to make sure it looks clean
- Recut only if needed, so the corners and joints fit nicely
Step 4: Position the Side Trim Against the Wall
Once the trim is cut, you can start placing the side pieces against the wall. This is the point where everything starts coming together, because now you are setting the seal where it will actually do its job.
- Hold the side trim piece in place against the wall
- Make sure the flat side sits flush against the surface
- Check that the rubber flap rests lightly against the garage door
- Adjust the trim until the rubber touches the door evenly
- Look from top to bottom to make sure the piece stays straight
- Avoid pushing it in too hard while positioning it
Step 5: Do Not Press the Seal Too Tightly
This is one of those small details that can make a big difference. When you push the trim into place, the rubber seal should rest gently against the garage door, not get crushed against it. You want contact, but you do not want pressure that makes the door fight back every time it opens or closes.
Step 6: Tack the Trim in Place First
Before you fully secure the trim, it helps to tack it in place with just a couple of nails. This gives you a chance to step back, assess alignment, and make sure everything is set up as it should be before you commit to the full install.
It is a simple step, but it saves a lot of annoyance later. Sometimes the trim may look straight up close, then seem slightly off once you take a second look. By starting with just a few nails, you can still make small adjustments if the rubber is not sitting evenly against the door or if the trim needs to shift a little.
Step 7: Fasten the Trim All the Way Down
Once the trim is sitting where you want it, go ahead and secure it fully. At this point, you are no longer testing the position. You are locking it in so the seal stays snug and even over time.
If your trim has pre-made nail holes or divots, use them. They are there to help keep the fastening consistent and to hold the trim tightly against the wall without leaving sections loose.
- Work your way down the trim instead of fastening everything in one area first
- Place nails in each pre-made hole or divot if the trim has them
- Keep checking that the trim stays straight as you go
- Make sure the rubber still sits evenly against the door
- Avoid overdriving the nails so the trim does not shift or bend

How to Winterize Garage Doors: Tips for Getting Your Garage Doors Winter-Ready
What Can Happen if You Don’t Weatherproof Your Garage Doors?
Failure to weatherproof your garage door leaves your entire garage vulnerable to external elements. This impacts comfort, energy efficiency, and stability of your garage contents.
- Low energy efficiency. During winter, unsealed crevices will allow drafts, altering the temperature and making your heating system work harder.
- Water damage and moisture buildup. Water can easily work its way around your garage through holes. During the rainy season, your garage becomes very prone to moisture buildup, mold growth, and damp floors.
- Rust and corrosion. Unsealed doors allow humidity and water to settle on metal parts like hinges, springs, and tracks. This can lead to rust, which weakens components and affects performance.
- Pest and insect entry. Small gaps are an open invitation for bugs, rodents, and other pests. Once inside, they can damage belongings and create sanitation issues.
Weatherproofing is a standard process to ensure that outdoor elements remain outdoors and do not affect your items inside the garage. For professional and accurate weatherproofing, contact us at Raynor Door Authority.
Keep Your Garage Better Sealed With Raynor Door Authority
Weatherproofing a garage door is one of those small projects that can make your space feel noticeably better once it is done. It is not a complicated upgrade, but it does work best when each step is done carefully, especially around the frame, trim fit, and seal pressure.
After reading this, here are the next steps to take:
- Inspect. Inspect the trim, frame, and edges of your garage door to spot gaps, rot, or worn material.
- Measure. Measure the sides and top carefully so your weatherstripping trim fits cleanly.
- Get professional help. If the door is uneven or you want a cleaner long-term fix. Our team has decades of experience, trained technicians, and ongoing service support to help homeowners get a garage door that seals properly and performs the way it should.
Need help getting the seal right? Contact Raynor Door Authority to schedule service with a local garage door expert.